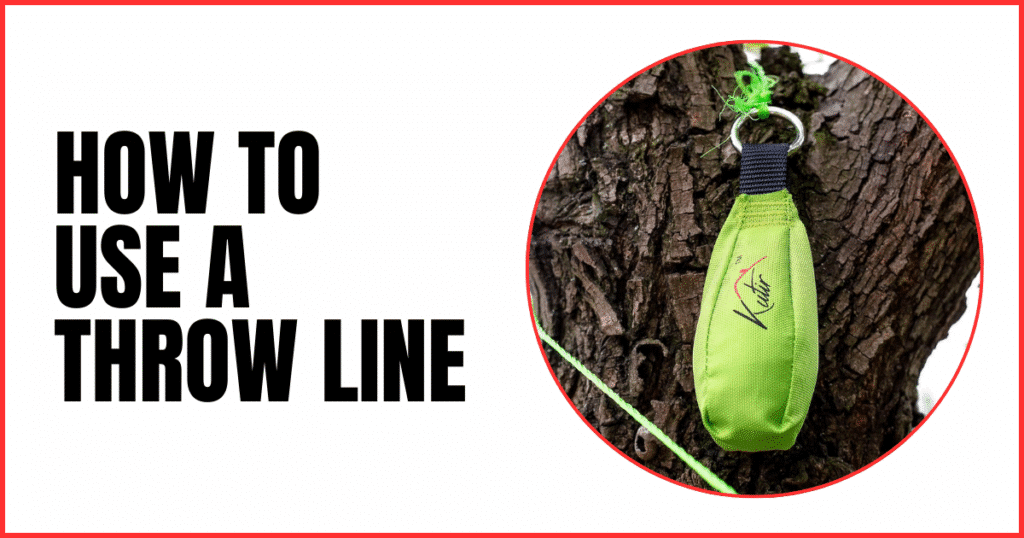
Safe and efficient tree work always starts from the ground, and the throw line is your first tool. With just a light rope and a weighted bag, you can reach high branches without ever climbing a ladder. But if you don’t use it correctly, the same tool can turn into frustration with tangles, missed throws.
To use a throw line, start by attaching the weight securely to one end. Anchor the other end so it doesn’t shoot away. Grip the line properly, build a smooth pendulum swing, and release toward your target. Once the weight drops over the branch, manage the slack and retrieve the line without snags.
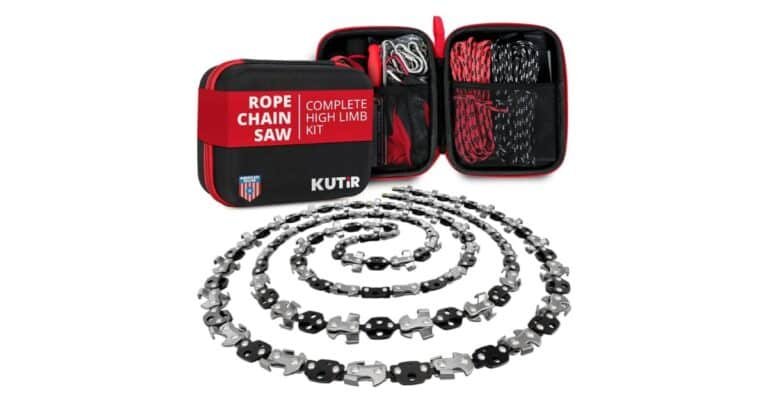
Kutir’s 11oz Throw Weight and Line Kit makes every step easier. With a heavy-duty 600D storage bag, a high-visibility weighted pouch, and strong nylon rope, it gives you precision and durability.
Essential Throw Line Equipment You Need to Collect First!
Before you can set a line in a tree, you need the right tools. Each piece has a specific role, and together they make your work efficient and safe.
| Equipment | Description |
| Throw Line | Lightweight, low-friction cord (usually 1.5–2 mm). Common types include UHMWPE fibers like Samson Zing-It or Teufelberger Dynaglide. |
| Throw Bags | Weighted pouches (8–20 oz) that carry the line over branches. Tear-drop designs such as Harrison Rockets are widely used. |
| Throw Cube | Folding cube that stores the line neatly. Prevents tangles during transport and keeps throws smooth. |
| Carabiners | Small clips, often locking, used for double bagging or attaching two lines together. |
| Big Shot | Pole-mounted slingshot for very high or obstructed throws. |
| APTA (Air Powered Tree Accessor) | Compressed-air launcher for long, accurate throws into tight unions. |
| Cambium Saver | Protective sleeve or ring system placed once the line is set, reducing rope wear and bark damage. |
How to Use a Throw Line? Professional Step-by-step Guide
Step 1: Attach the Throw Bag Correctly
Your first move determines everything that comes next. Start by connecting your bag to the line with the right knot for your situation.
Choose a bite knot when you need speed. Pick a girth hitch on a spliced eye when security matters most. Go with a slipknot grip if you want trigger-style release.
Once you’ve tied your knot, pull it tight against the bag ring. Point the tag end toward the cube, never toward the weight. Test your work with a hard tug.
Skip this test and you’ll watch your connection snap mid-air. You lose your shot and start over.
Step 2: Anchor the Other End of the Line
Now that your bag is tied on, secure the other end. This keeps the line from flying away when you throw. Clip it to a carabiner on your harness or loop it around a ground anchor. Use a quick round turn if you need something simple.
Do not trap it under your boot. Your foot can slip, and the whole line can shoot out. By anchoring first, you stay in control from the moment the bag leaves your hand.
Step 3: Hold and Grip the Line Properly
Your throw only works if your grip is right. Picture making a hook with your index finger. Lay the line over that hook. Now bend the line back across your middle finger. Pinch both strands tight with your thumb.
This locks the line in your hand, but it still slides free when you release. Keep your hand relaxed. If you squeeze too hard, the bag jerks off course. Some climbers tie a slipknot for grip, but master the finger hold first.
Tip: Swing the bag gently. Feel the line slip over your finger like thread off a spool. That smooth release is what you’re aiming for.
Step 4: Build a Pendulum Swing
A strong swing sets up a clean throw. Think of the bag like a pendulum. You want smooth rhythm, not jerky motion. Here’s how to build it:
- Stand square to your target. Keep your feet shoulder-width for balance.
- Hold the bag low. Start between your legs for two-hand throws, or by your hip for one-hand throws.
- Let the bag swing. Rock it forward and back, adding height each time.
- Keep tension in the line. Never let slack creep in or the swing will collapse.
- Time your release. Watch the arc. The highest forward point is your launch moment.
- Keep the motion consistent. The swing creates power, not your arms. Guide the rhythm, stay steady, and build control.
Tip: Practice without throwing. Just swing the bag and stop. This teaches control before you add release.
Step 5: Release Smoothly at the Target
Your release is the most important part of the throw. Everything you’ve done so far, tying the bag, anchoring the line, setting your grip, and building the pendulum, leads to this moment.
- Aim above the target. If you aim right at a union, you often hit it and stop short. Visualize the bag passing through a point one to two feet higher.
- Time the forward swing. Release when the bag reaches the peak of its forward arc. That’s when momentum is strongest and smoothest.
- Guide, don’t snap. Open your fingers and let the line run off naturally. Snapping your wrist or forcing the release sends the bag sideways.
- Keep your body square. Face your shoulders and hips toward the target. A crooked stance pulls the shot off course.
- Finish with your finger. Point your index finger at the target as you let go. The bag will track along that line.
Think of it as a flow: swing, rise, release, follow-through. One clean motion.
Step 6: Manage Slack and Retrieve the Bag
Once the bag leaves your hand, your job is not finished. Keep light tension on the line as it flies. If slack builds, the line can tangle or catch on bark before the bag drops. Guide the rope with your fingers so it runs smooth and free.
Watch the bag’s path. If it overshoots or snags, pull back steadily, never yank. A sharp pull can wedge it tighter or even damage the line. When the bag reaches the ground, gather the line neatly into your cube or coil. Keeping it organized now makes your next throw faster and cleaner.
Tip: Always reset your line after each throw. A tidy system saves time and prevents frustration on the next shot.
Assisted Throwing Devices: Big Shot & APTA Explained
Hand throws cover most work, but some trees push beyond your reach. A thick understory, a 90-foot canopy, or an awkward angle can make a hand throw impossible. This is when arborists turn to launchers: the Big Shot and the APTA.
i) The Big Shot
The Big Shot is a tall fiberglass pole with a giant slingshot on the end. It’s simple but powerful.
How to use it:
- Connect the two pole sections and secure the bands.
- Place your throw bag in the pouch.
- Pull the pouch down evenly, keeping the bands aligned.
- Aim slightly above your target union.
- Release smoothly, or attach a trigger for more precision.
The Big Shot is excellent for breaking through heavy foliage or shooting into tall hardwoods. It adds distance and power but still depends on your aim.
ii) The APTA
The Air Powered Tree Accessor is more advanced. It uses compressed air to fire a throw bag like a cannon.
How to use it:
- Load your bag into the barrel.
- Pump or charge the chamber to the right pressure.
- Aim directly at your target branch.
- Press the release valve to fire.
The APTA sends a bag straighter and higher than the Big Shot, with less effort from you. It’s ideal for very tall or narrow-crotched trees where precision matters. The trade-off is weight, cost, and the need for an air source.
Other Popular Throw Line Throwing Techniques
Every throw is different, and so is every tree. You need more than one technique in your toolkit. Learn these core methods, practice them, and you’ll know which to choose when you’re standing under the canopy.
1. Two-Handed Granny Throw
Start by threading the line through the bag’s ring. Hold both sides, swing it between your legs, then release together. This centered style gives balance and works well when you’re aiming for a mid-level branch.
2. One-Handed Side Throw
Hold the line in one hand, off to the side of your body. Swing and release with control. This is the method many arborists trust for higher shots when precision matters most.
3. Slipknot Grip Throw
Tie a small slipknot to create a solid grip. As you throw, the knot pops free, letting the bag fly clean. Use this when you’re targeting a tight union that needs a smooth, extended release.
4. Over-the-Shoulder Toss
Swing the bag behind your back and launch it overhead. This comes in handy when you don’t have room to swing sideways, but you still need to reach a vertical target.
5. Low Grenade Toss
Hold the bag low and throw underhand with a short push. It’s quick, simple, and perfect when you only need to set a line on a low branch.
How to Get Your Line on the Right Branch?
Landing a bag in the canopy is only half the job. The real skill is isolating the branch you want, not three others tangled around it. With practice, you’ll guide the line exactly where you need it. Here are the key strategies every arborist uses.
- Pendulum Adjustment: Once the bag is over a limb, swing it back and forth. Use the motion to “walk” the line off unwanted branches until it rests on your target union.
- Opposite-Side Pull: If your line drapes over extra limbs, pull from the opposite end. This forces the bag down the side you need, clearing obstructions.
- Double Bagging: Attach a second throw line and bag to the first with a carabiner. By pulling and shifting one line, you guide the other into the exact crotch you want.
- Rescue with a Second Line: When the bag wedges in bark or crotches, set another line above it. Clip onto the stuck bag, then lift and free it by pulling the upper line.
Troubleshooting Common Throw Line Problems
Even experienced arborists encounter setbacks. Bags stall, knots release, or cubes tangle. Each issue has a cause, and with the right correction, you can recover efficiently.
Tangled Lines and Throw Cubes
A disorganized cube leads to crossed coils and knots. This often happens when the line is packed without care or when debris falls inside. Avoid forceful pulling. Instead, free one strand at a time and re-coil neatly. Keep the cube clean and fold it correctly to prevent future tangles.
Snags on Bark or Stubs
A bag may stop midway because of rough bark or a hidden stub. Pulling harder usually worsens the jam. Instead, use gentle swings to walk the bag down, or pull from the opposite end. For rough-barked trees, heavier weights often clear obstructions more reliably.
Slipping Knots
If the bag detaches midair, the knot was either poorly dressed or mismatched to the ring size. A loosely tied bite knot is a common cause. Always test knots by applying firm tension before throwing. Consider consistent solutions such as girth hitches or spliced eyes for higher security.
Overshot Throws
Overshooting occurs when you aim directly at a branch instead of slightly above it. The bag then lands tangled in foliage below. Correct this by visualizing a target point above the union. If overshot, reset the line into the cube and repeat rather than dragging through obstructions.
Stuck Bags
A bag wedged in a crotch is often the result of a poor angle or excessive friction. Pulling forcefully can lock it in tighter. A more effective solution is to set a second line above the jam, clip it to the bag, and lift it free. If only one line is available, throw beyond the jam and adjust the angle to release it.
Advanced Throw Line Strategies for Tricky Trees
Some trees demand more than a standard throw. Tight unions, rough bark, and crowded crowns require methods that give you control in difficult setups.
- Connect a second throw line to the first with a carabiner. Pulling one line shifts the other. Use this when your throw lands too high or needs repositioning to reach a lower union.
- Keep light tension on the bag and swing it side to side. The motion walks the line off unwanted branches and seats it only on the union you want.
- If the bag is stuck, set another line higher. Clip it to the trapped bag and pull upward. This lifts it free without climbing.
- Throw over the canopy on purpose. Once across, pull the line carefully to guide it back into the chosen crotch. This saves time when direct shots are blocked.
- Tie a slipknot to grip for the throw. As the bag travels, the knot pops free, giving extra reach and a clean release for narrow targets.
Safety Rules and Best Practices for Throw Line Use
Throw line work looks simple, but mistakes can injure you or damage property. Following strict habits keeps your throws safe, clean, and consistent.
- Always use a helmet and safety glasses. A falling throw bag can hit with the force of a rock.
- Secure one end before every throw. An unanchored line can whip out of reach, across yards, or into windows.
- Look for cars, people, and glass before throwing. Never launch if anyone is in the danger zone.
- Never stand under the bag’s arc. Keep your body to the side so the weight cannot swing back into you.
- Manage loose line at your feet. Coils can catch on shoes, tools, or harness gear, ruining a throw or tripping you.
- Check lines for frays and bags for loose stitching or bent rings. Replace worn gear before it fails.
- Re-coil the line into the cube right away. A clean system saves time and prevents tangles on the next attempt.
In Closing
Mastering the throw line is about more than getting a rope in a tree, it’s about working smarter and safer. From choosing the right equipment to practicing reliable techniques, every step builds your accuracy and confidence.
Troubleshooting problems, isolating the right branch, and even using advanced tools like the Big Shot all become easier once you understand the basics.
Ready to put this knowledge into action? Equip yourself with Kutir’s 11oz Throw Weight and Line Kit for precise, dependable results on every climb.
Frequently Asked Questions
Question: What throw bag weight is best for beginners?
Answer: A 10–12 oz throw bag is the most practical starting point. It offers accuracy and manageable weight, helping beginners build consistent technique.
Question: Can any rope be used with a throw bag?
Answer: No. The ideal throw line is 1.5–2 mm thick and made from low-friction fibers like UHMWPE. This design prevents snagging and moves smoothly over bark.
Question: How high can a line realistically be thrown by hand?
Answer: Most arborists can throw 30–40 feet with practice. For greater heights, tools such as the Big Shot or APTA provide safer, more accurate results.
Question: How long does a throw line typically last?
Answer: Lifespan varies with use. Rough bark shortens durability. Inspect lines often for frays or stiffness and replace when glide or strength is compromised.