A proper wrist measurement without a measuring tape might seem impossible. But it’s actually easier than you think. If you’re shopping for a bracelet, watch, or medical ID band, the right wrist size is important for comfort and style. An incorrect wrist measurement can lead to a tight, uncomfortable fit or a piece that slides off your hand. So, how to measure wrist without a measuring tape?
You can easily do it using materials you already have around the house. String, paper, or even a dollar bill can be great alternatives.
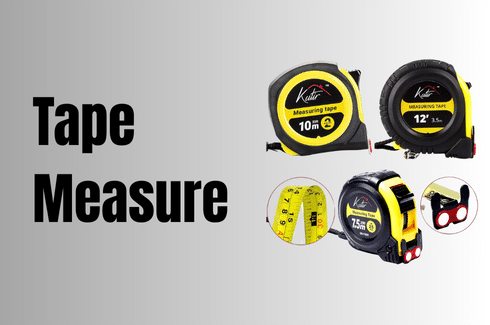
At Kutir Tools, we specialize in providing top-quality measuring tools that help make tasks easier. Our 12-ft tape measures, utility knives, and rope chainsaws are designed with precision and durability in mind. We offer the best solutions for DIY enthusiasts and professionals.
How To Measure Wrist Without a Measuring Tape? 7 Effective Method
Method 1: Use a String or Ribbon
Measuring your wrist with string or ribbon is a simple and effective way to find your size. It’s a great alternative when you don’t have a measuring tape on hand.

Step 1: Prepare the String or Ribbon
Take a piece of string, ribbon, or shoelace. It should be about 12 inches long to give you enough length for wrapping. If you don’t have one long enough, tape two pieces together.
Step 2: Wrap the String Around Your Wrist
Place your wrist on a flat surface with your palm facing up. Wrap the string around the widest part of your wrist. Make sure it’s snug but not tight. You don’t want to pull the string too tight, or you might get an inaccurate measurement.
Step 3: Pinch the Overlap
Once the string completely circles your wrist, pinch the point where both ends overlap. This is your starting point to measure.
Step 4: Mark the Spot
If you’re using string, use a pen or marker to mark where the two ends meet. If you’re using a ribbon, you can either mark it or cut the ribbon where it overlaps. Be precise to get an accurate reading.
Step 5: Measure the Length
Lay the string flat against a ruler or any straight edge. Measure from the end of the string to your mark. This is the circumference of your wrist.
Step 6: Add Extra Length for Comfort
Once you have your wrist circumference, add half an inch to the measurement. This ensures the bracelet or watch will fit comfortably and not be too tight. For example, if your wrist measures 6 inches, your bracelet size should be 6.5 inches.
Method 2: Using Yarn, String, Or Dental Floss
Wrap yarn, string, or dental floss around your wrist. Mark where it overlaps. Lay it flat and measure with a ruler. For more details, see this guide on measuring your wrist with string or dental floss for a quick, accurate result at home.

Step 1: Get the Material
Grab a piece of yarn, string, or dental floss. Make sure it’s long enough to wrap around your wrist. About 12 inches should be enough, but you can always cut extra.
Step 2: Wrap Around Your Wrist
Place your wrist flat on a surface with your palm facing up. Wrap the yarn, string, or floss around the widest part of your wrist. Ensure it’s snug but not too tight.
Step 3: Mark the Overlap
Once the material overlaps itself, pinch the spot where the two ends meet. If you’re using dental floss, use your fingers to hold the ends together.
Step 4: Measure the Length
Lay the yarn, string, or floss flat against a ruler or any object with a known length (like a dollar bill). Measure the distance between the ends, from where the string overlaps to the starting point.
Step 5: Add Extra for Comfort
For comfort, add half an inch to the measurement. This ensures that your bracelet or watch will fit without being too tight. For example, if your wrist measures 6 inches, add half an inch for a 6.5-inch bracelet.
Method 3: Use a Paper Strip
If you don’t have a string or a ruler, a simple strip of paper can do the job. This method is handy when you need to measure your wrist quickly and don’t have access to a measuring tape. It’s an easy and accessible way to get an accurate wrist measurement.

Step 1: Cut the Paper Strip
Take a piece of paper and cut it into a thin strip. The strip should be about 1/2 inch wide and long enough to wrap around your wrist (roughly 6–8 inches).
Step 2: Wrap the Paper Around Your Wrist
Place your wrist on a flat surface with your palm facing up. Wrap the paper strip around the widest part of your wrist, making sure it’s snug but not tight.
Step 3: Mark Where the Paper Meets
Once the paper overlaps, mark the spot where the two ends meet. Use a pencil or pen to mark the point where the paper touches itself.
Step 4: Measure the Length
Lay the paper flat against a ruler or any object with a known length (such as a dollar bill). Measure from the starting point to the marked spot to determine your wrist circumference.
Step 5: Add 1/2 Inch for Comfort
To make sure your bracelet or watch isn’t too tight, add half an inch to your wrist measurement. For example, if your wrist measures 6 inches, the bracelet size should be 6.5 inches.
Method 4: Utilize Online Printable Wrist Sizer Method
If you prefer a more accurate, structured method, using an online printable wrist sizer can be a great solution. Many jewelry brands and websites offer printable wrist sizer tools. These tools allow you to measure your wrist precisely at home, using just a printer and a ruler.
Step 1: Find a Printable Wrist Sizer
Search for a trusted website that offers a downloadable wrist sizer template. Many jewelry retailers or watch brands provide these tools for free. Make sure the website clearly states that the printable sizer is to scale.
Step 2: Print the Sizer
Print the wrist sizer on standard letter-sized paper. Ensure that your printer is set to “actual size” (not “scale to fit”) to ensure the printed ruler is the correct size. Double-check that the printed measurement is accurate by comparing it with a real ruler.
Step 3: Cut Out the Sizer
Once printed, carefully cut along the outlined edge of the wrist sizer. Most templates will have a cut-out area to fit around your wrist.
Step 4: Wrap the Sizer Around Your Wrist
Place the cut-out sizer around your wrist, starting at the pointed end. Wrap it snugly but comfortably around the widest part of your wrist. You should be able to see the marked lines indicating your wrist measurement.
Step 5: Read Your Wrist Measurement
Once the wrist sizer is wrapped around, read the measurement that lines up with the start of the template. This will be your wrist circumference. If necessary, add half an inch for comfort, especially if you plan to wear bracelets or watches that are slightly snug.
Method 5: Smartphone App Method
If you don’t have a traditional ruler or measuring tape, your smartphone can be a handy tool. Many apps allow you to measure your wrist size directly using the camera or screen of your phone. This method combines convenience and technology for a quick wrist measurement.
Step 1: Download a Measuring App
Search for a measuring app on your phone’s app store. For iPhones, use the Measure app, and for Android phones, download a similar ruler app. Make sure to check app reviews to ensure it’s reliable.
Step 2: Open the App and Prepare Your Phone
Launch the app and follow any on-screen setup instructions. Most apps will ask you to calibrate your phone by measuring a known object, like a credit card, to ensure accuracy.
Step 3: Position Your Phone
Hold your phone steady above your wrist. You may need to position your phone at a specific distance or angle for the app to read the measurement accurately. Follow the app’s prompts carefully to align your wrist correctly within the frame.
Step 4: Capture Your Wrist Measurement
Once your wrist is aligned within the app’s guidelines, tap the screen to capture the measurement. The app will display your wrist circumference based on the camera’s perspective.
Step 5: Double-Check for Accuracy
Some apps may give a rough estimate or prompt you to adjust the distance for a more precise reading. Measure your wrist again using the app, following the on-screen instructions to get a more accurate result.
Step 6: Add Extra Length for Comfort
If you’re using the app for bracelet or watch sizing, remember to add half an inch to the measurement for a comfortable fit. For example, if your wrist measures 6 inches, your bracelet size should be 6.5 inches.
Method 6: Measure Comparison to Objects
If you don’t have string, paper, or measuring apps, you can still measure your wrist by comparing it to common objects with known sizes. This method relies on the size of everyday items you already have around your home. It’s simple and effective, requiring no special tools.
Step 1: Select an Object with a Known Size
Choose an object that has a consistent and known size. Common options include:
- A credit card (3.37 inches wide)
- A dollar bill (6.14 inches long)
- A standard pen (about 5.5 inches)
- A key (approximately 2.5 inches)
Step 2: Place the Object Next to Your Wrist
Place the object next to your wrist, aligning it with the widest part of your wrist. Ensure the object lies flat and fits comfortably around the circumference.
Step 3: Compare the Object’s Size to Your Wrist
Note how the object fits around your wrist. Here’s how to interpret the comparison:
- Credit card: If it wraps comfortably around, you likely have a small wrist.
- Dollar bill: If it barely overlaps, you probably have a medium wrist.
- Pen/Key: Use these as rough guides for estimating a larger wrist size.
Step 4: Estimate Your Wrist Size
Based on the object’s size, estimate your wrist circumference. If needed, you can measure the object first with a ruler to see how it compares directly.
Step 5: Add Extra Length for Comfort
As with other methods, add half an inch to your measurement to account for comfort. For instance, if a dollar bill fits snugly, add a half-inch for a better bracelet or watch fit.
Method 7: Dollar Bill Method
The Dollar Bill Method is a simple way to measure your wrist when you don’t have any traditional measuring tools. It uses the standardized length of a U.S. dollar bill as a reference. This method is quick, especially when you’re on the go and need an immediate estimate.
Step 1: Grab a Dollar Bill
Take a U.S. dollar bill. It is 6.14 inches long, which makes it a convenient and reliable tool for measuring. If you’re outside the U.S., look for similar-sized bills or objects that are roughly 6 inches in length.
Step 2: Place the Dollar Bill Around Your Wrist
Hold the dollar bill and wrap it around your wrist. Start with one end of the bill at the smallest part of your wrist and bring the other end around.
Step 3: Check How the Dollar Bill Fits
Observe how the two ends of the dollar bill meet. Here’s what to look for:
- If the two ends touch comfortably, your wrist is likely small.
- If the ends almost meet but don’t quite touch, your wrist is likely medium.
- If the ends don’t come close to touching, your wrist is likely large.
Step 4: Estimate the Wrist Size
Use the number of bill lengths to estimate your wrist size:
- Small Wrist: One full dollar bill (6.14 inches)
- Medium Wrist: One full bill, with a little overlap
- Large Wrist: One full bill and more than half of the second bill
Step 5: Add ½ Inch for Comfort
To make sure your bracelet or watch isn’t too tight, add half an inch to your wrist size. If you have a small wrist and the bill touches, your size is approximately 6.14 inches, but with the added comfort, your bracelet size should be around 6.64 inches.
Common Mistake To Avoid While Measuring Wrist Without Measuring Tape
- Wrapping the material too tightly around your wrist will give you an inaccurate measurement. Ensure it’s snug but not uncomfortable.
- Always measure at the widest part of your wrist, which is usually just below the bone. Measuring at a different spot can lead to an incorrect fit.
- Avoid using materials that stretch (like elastic) as they can cause your measurement to be too large. Stick to non-stretchy options like string or paper.
- Forgetting to add half an inch to your measurement can result in a bracelet or watch that’s too tight. Always add extra for comfort, especially if you’re buying jewelry that will be worn all day.
- Be careful when marking the overlap point of your string or paper. Ensure it’s clearly marked and measured precisely to avoid errors.
- When measuring with string or paper, make sure the material lies flat against your wrist. Twisted material can throw off your measurement.
- Always measure directly on your skin. Measuring over clothing adds extra material and may lead to inaccurate sizing.
In Closing
Measuring your wrist without a tape measure is easy and efficient with everyday materials like string, paper, or even a dollar bill. By following simple methods, you can get accurate measurements for bracelets, watches, and other accessories without the need for specialized tools. Remember, accuracy is key for a comfortable and secure fit.
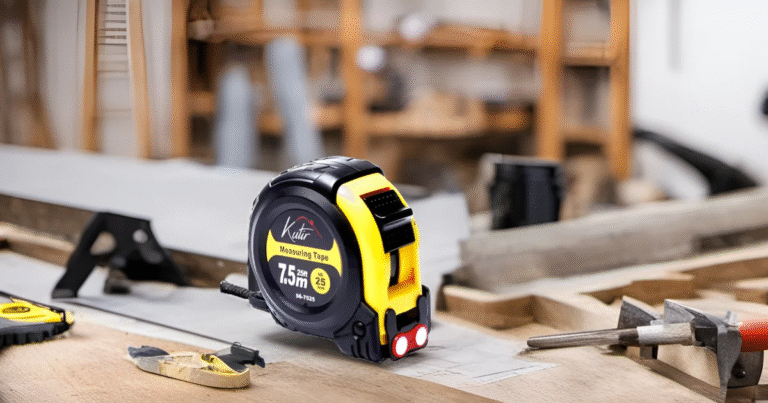
For precise measurements and high-quality tools, visit Kutir Tools. Check out our premium measuring tapes and other tools, designed for both professionals and DIY enthusiasts. Get yours today!
Frequently Asked Questions
Question: Can I Measure My Wrist Without a Measuring Tape?
Answer: Yes, you can measure your wrist without a measuring tape. Simply use materials like string, yarn, dental floss, or even a strip of paper. Wrap the material around your wrist snugly, mark the point where it overlaps, and then measure it using a ruler or any object with known dimensions.
Question: Why Accurate Wrist Size Matters?
Answer: Accurate wrist size ensures a comfortable fit for bracelets and watches, preventing them from being too tight or too loose. It helps avoid discomfort, skin irritation, and ensures the jewelry looks and feels great.
Question: How Do I Know If My Wrist Size Is Small, Medium, or Large?
Answer: Your wrist size can be categorized based on your measurement. A small wrist is typically under 6 inches, medium is 6–6.5 inches, and large is over 6.5 inches.
Question: How Accurate Are Online Wrist Sizers?
Answer: Online wrist sizers, when used correctly, are accurate for determining your wrist size. Just ensure you print the template at the correct scale.